May 25, 2026
It starts with a subtle ripple near the leading edge, barely visible under shop lights. By the time the roll is half-finished, that ripple has become a crease deep enough to catch a fingernail. The entire batch—hundreds of square meters of printed film—is headed for the scrap bin. If this scenario feels familiar, you’re not alone. Lamination wrinkles remain one of the most persistent and costly defects in flexible material finishing, affecting everyone from flexible packaging converters to wide-format digital print shops.
Most troubleshooting guides treat wrinkles as a single problem with a single fix. The reality is messier. Wrinkling can originate at unwinding, during the nip, inside the heating zone, or during rewinding. Each root cause leaves a distinct pattern, and recognizing that pattern is the first step toward a permanent solution. Let’s walk through the diagnostic process that experienced operators use, then look at how modern web-handling architectures prevent the problem from returning.
Decoding the Wrinkle: A Quick Field Guide
Before adjusting anything, stop the line and inspect the wrinkle location and shape. This field guide is compiled from on-floor experience across dozens of coating and laminating installations, and it correlates defect appearance to the most likely source.
| Wrinkle Pattern | Likely Root Cause | First Thing to Check |
| Diagonal creases radiating outward from the centerline, consistent across the roll | Excessive web tension or uneven tension profile across the width | Tension zone setpoints; check for misaligned idler rolls with a dial indicator |
| Small, irregular pucker marks appearing randomly, often accompanied by a visible adhesive line | Inconsistent adhesive coat weight or trapped air at the nip entry | Doctor blade wear, nip gap parallelism, and incoming sheet flatness |
| Parallel wrinkles running in the machine direction, usually near the edges | "Baggy" edges on the substrate or film, or misaligned unwind stand | Unwind alignment laser check; verify core chuck concentricity |
| Wrinkles only on the laminated film layer, never on the substrate | Film roll telescoping or improper film tension relative to the web | Separate tension control calibration for the film unwind |
This diagnostic approach is echoed in industry best-practice documents. For instance, the Flexible Packaging Association's troubleshooting references consistently point to tension control as the primary variable in wrinkle formation—accounting for an estimated 60% of all lamination wrinkle incidents according to their member survey data.
Step-by-Step Elimination Protocol
Once you’ve identified the likely source, use this systematic protocol rather than making multiple adjustments at once. Each step isolates a specific variable, so you’ll know exactly what fixed the problem.
Step 1: Verify mechanical baseline (15–20 minutes)
Operators often skip this step and go straight to tension tweaks, only to find the problem returns next shift. Use a straightedge and feeler gauge to check nip roll alignment. Measure roll parallelism at both ends and at the center. A deviation as small as 0.05 mm can create enough pressure variation to cause edge puckering on thin films. Also inspect all idler rolls downstream of coating for bearing play—a single lazy roll can introduce a diagonal wrinkle that pulses on and off.
Step 2: Map the tension profile
Record tension readings at every zone from unwind to rewind, both at steady-state speed and during ramp-up/ramp-down. The goal is not uniform tension, but a tapered profile where tension slightly decreases toward the rewind to prevent telescoping. A common finding: the unwind brake or motor is fighting the pull roll, creating a tension spike that stretches the web unevenly just before the nip. Solve this by tuning the dancer or load cell feedback loop, not by increasing overall tension.
Step 3: Isolate the nip variables
With tension stabilized, focus on the nip itself. Measure nip width using pressure-sensitive film (Fuji Prescale or similar) across the full width. A wedge-shaped nip impression indicates crown wear or uneven loading. Adjust accordingly. Next, examine the entry angle of the film into the nip. If the film meets the web at a sharp angle, it forms a tiny air wedge that collapses unevenly under pressure—a classic mechanism for random puckers. A film introduction bar or adjustable lay-on roller can smooth this entry path.
Step 4: Check thermal uniformity (if heat-assisted)
For thermal lamination processes, uneven heating across the roll face causes differential film shrinkage. Use a contact thermocouple or thermal imaging camera to scan the roll surface temperature at multiple points. A temperature variation greater than ±3°C warrants investigation of the heating element or circulation system.
At this point, many operations identify and fix the immediate cause. The wrinkle goes away—for a few weeks, or until the next material change. Then it comes back. This cycle is frustrating and expensive, and it’s exactly what drives some converters to reconsider their approach to web handling entirely.
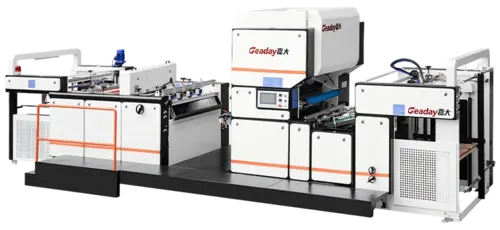
When Manual Adjustments Aren't Enough: The Limits of Retrofitted Equipment
The protocol above relies on skilled operators making precise adjustments. That works well in facilities with experienced crews and consistent material specifications. But three trends are making this harder to sustain:
-
Material variability: Thinner films, recycled-content substrates, and bio-based materials all behave differently under tension. A profile tuned for one roll may not work for the next.
-
Short-run economics: Frequent job changes mean less time for fine-tuning and more pressure to get lines running fast.
-
Workforce transitions: Veteran operators are retiring, and their tension-tuning intuition—built over decades—walks out the door with them.
These challenges are not solvable with incremental upgrades. They point toward a different machine design philosophy, one where web path control is engineered into the structure rather than being dependent entirely on operator skill. For coating and laminating operations struggling with recurring wrinkle defects, a purpose-built vertical web path configuration can fundamentally change the variables at play. Explore how vertical web-handling architecture reduces wrinkle-prone variables.
Preventing Recurrence: Building Out the Process Envelope
Whether you fix the immediate problem through the protocol above or invest in different equipment, preventing recurrence demands ongoing discipline. Two practices are especially valuable:
Document material-specific recipes. Create a simple log for each substrate-film combination that records verified tension setpoints, temperature profiles, and nip pressure for successful runs. When a new job is set up, the operator starts from a known-good baseline rather than guessing. This is low-tech but highly effective—and it accumulates institutional knowledge that stays with the company.
Implement condition-based roll maintenance. Idler rolls are consumable components in a precision web path. Instead of replacing them on a fixed schedule, periodically measure rotational resistance and runout. A roll that spins freely when tested by hand may still have bearing wear that introduces a high-frequency tension ripple at speed. Catching these before they cause defects saves troubleshooting time and scrap.
For operations considering a more structural upgrade to their laminating capability, it’s worth examining machines designed with integrated web-tension intelligence. See how modern laminating systems handle tension across multiple zones automatically. Rather than relying on operator intervention at each tension zone, these systems maintain a consistent film path from unwind through the nip to rewind, which directly addresses the root cause of most wrinkle defects.
The Bottom Line
Lamination wrinkles are a solvable problem—but only if you approach them diagnostically. Check mechanical alignment first, map your tension profile systematically, and isolate the nip conditions before touching anything else. That sequence alone will resolve most cases.
If you find yourself fighting the same wrinkle across multiple jobs, materials, and shifts, the bottleneck may not be the adjustments you’re making but the web-path architecture you’re adjusting within. In those situations, it’s worth taking a closer look at equipment that’s designed to prevent these defects from the start. For a deeper dive into one such approach, learn more about the vertical laminating configuration and request detailed specifications.
Disclaimer: This article provides general troubleshooting guidance based on common laminating processes. Specific machine characteristics, material properties, and process conditions may require consultation with your equipment manufacturer or process engineer.